I’ll have to see a script first

I’ve completed the rough script for pavo. What remains is writing the metadata–in its own way, as much of a challenge as the script itself, as this is where the game logic is really implemented–and running through as much testing as I can before the itch to release becomes unbearable.

Anyone who’s played through Fissure (and I have no idea if anyone has) might notice a few similar ideas leaking through in pavo. Thing is, Fissure and pavo share a common ancestor: a game called Transients that I never got around to creating. In that game, you would have assumed the role of a robotic probe imprinted with the personality (and certain memories) of a human being. The goal would have been to explore a space cave (there’s the Fissure connection) as well as your own past (and there’s a hint of what’s to come in pavo).

Still hoping for a mid-January release.

work in progress still in progress

“Major coding has been completed.” I so want that on a t-shirt, or a gravestone. It seems that in the last week I’ve completely rewritten the dialogue code several times as my ideas change.

I do have strong ideas about how I want the player to interact with pavo and what I want to be going on underneath. I’m trying out some models that I’ve had over the last couple of years regarding how dialogue, and by extension storytelling, can work. I’ll cover that in more detail once the game’s released. For now, the work continues. I’m not moving the release date out of its somewhat vague “mid-January” area just yet.

Happy? New! Year.

pavo, updated

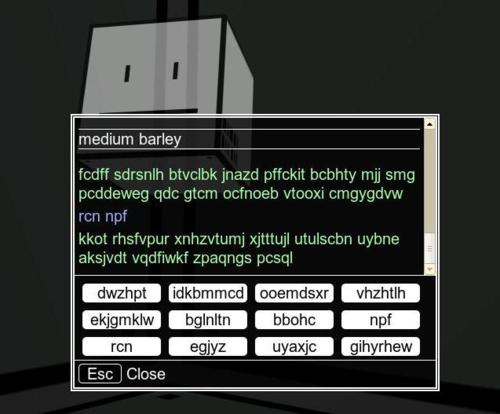
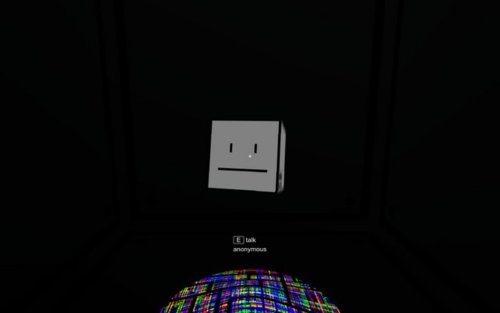
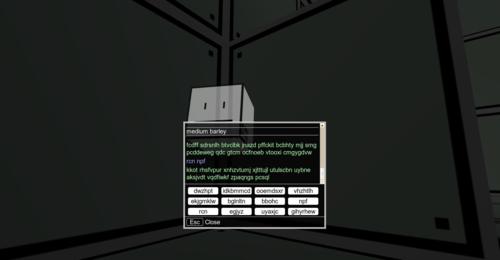
Major coding has been completed on pavo, and I’m just now writing the script. It’s coming along nicely, but I’m certain the game won’t be available until mid-January. I may be posting a few choice excerpts between now and then, either to here or Twitter. In the meantime, here’s a screen shot of the new dialogue, er, dialog.

It’s running from a test script at the moment.

The actual game is in English, I promise.

sculpting noise and faking light

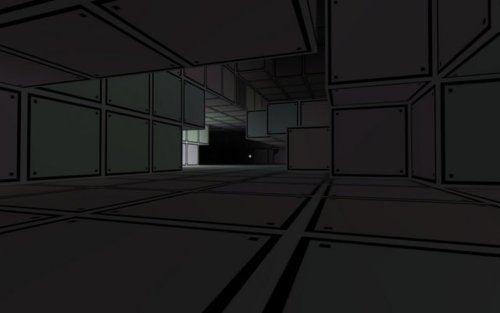
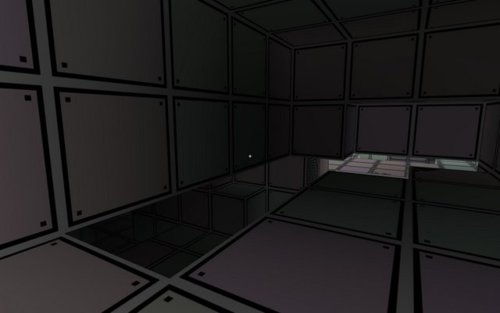
Unless something goes horribly wrong with the collision detection code, here is a perspective gamers rarely get of their favorite games:
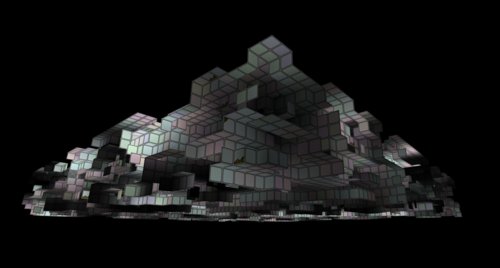
That’s the view from far outside the pavo map. To save on drawing time, it’s usual for the renderer to leave the back sides of polygons undrawn, which is why you can see into the map at all. I personally find it a little creepy at times, like I’m wandering the walls between worlds or something.

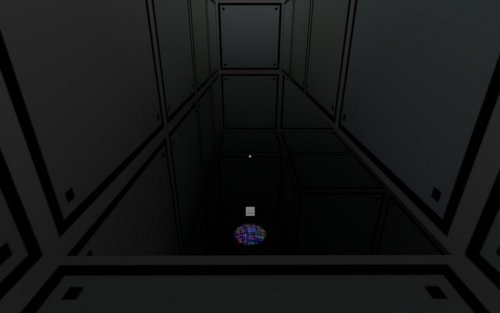
Here’s a top-down view of the same map:
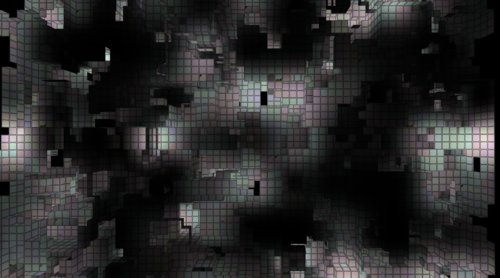
Where does all that structure come from? Well, I didn’t lovingly hand-craft each of the squares and slot them into place. I’m patient, but not that patient. Instead, I used the Noise3D object in the Foam library to generate it procedurally.

field = new FOAM.Noise3D(seed, 1.0, source.x, scale.x, source.y, scale.y, source.z, scale.z);

At first, I found the concept of a three-dimensional noise field hard to grasp. I can visualize a 1D noise field as a wobbly line, and a 2D noise field as bumpy surface. Each of these is created by rolling up a sequence of random numbers, and finding values that fit smoothly between adjacent numbers in the sequence. This is called interpolation.

In the 1D case, I have a noise function y = f(x), and can create my wobbly line by graphing y against x. The 2D case gives me a noise function y = f(x, z) for which I graph y against x and z to generate my bumpy surface. (I’ve written previously about using the Noise2D object to create such a surface for Fissure.) Both cases create surfaces via the displacement of points along a “flat” figure such as a line or a plane.

In three dimensions, we have to think about the noise field differently. It can’t be a displacement, because that means we would be displacing points on a cube into the 4th dimension. That might give us something visually interesting but hardly comprehensible. Instead, I think of the 3D noise object as a density function–a measure of the solidity of space at a particular point. Using that interpretation, I can assign a critical threshold that will divide “solid” space from “empty” space, and create a function that tells me which is which.

this.inside = function(x, y, z) {
	return field.get(x, y, z) > 0.5;
}

The function is called inside because it tells me if I’m inside the empty space–our game space. (Not much fun playing inside solid space, as you can’t move.) My 3D noise function is normalized to produce values from 0 to 1, and I’ve found that using the mean value of 0.5 as the threshold yields the most useful spaces.

So we have a function that tells us where the surface is. How do we turn that into an actual thing that we can see? I’ve written a simplified version of the marching cubes algorithm:

for (x = -RESOLUTION; x <= LENGTH.x; x += RESOLUTION) {
	nx = x;
	px = x + RESOLUTION;
	for (y = -RESOLUTION; y <= LENGTH.y; y += RESOLUTION) {
		ny = y;
		py = y + RESOLUTION;
		for (z = -RESOLUTION; z <= LENGTH.z; z += RESOLUTION) {
			nz = z;
			pz = z + RESOLUTION;

			o = this.inside(x, y, z);
			p = this.inside(x + RESOLUTION, y, z);
			if ( !o && p ) {

				... draw x-aligned square ...

			}
			if ( o && !p ) {

				... draw x-aligned square (alt winding) ...

			}

			p = this.inside(x, y + RESOLUTION, z);
			if ( !o && p ) {

				... draw y-aligned square ...

			}
			if ( o && !p ) {

				... draw y-aligned square (alt winding) ...

			}

			p = this.inside(x, y, z + RESOLUTION);
			if ( !o && p ) {

				... draw z-aligned square ...

			}
			if ( o && !p ) {

				... draw z-aligned square (alt winding) ...

			}
		}
	}
}

(The alternate winding refers to whether we’re drawing the figure clockwise or counter-clockwise. In order to make all polygons front-facing, we have to switch the winding order depending on whether we’re going into or out of the surface.)

Basically, it’s just a set of nested loops, each iterating through an axis in 3-space. Whenever I pass through the surface (represented by the noise function and threshold), I draw a square of the proper orientation. Put all those squares together and you have a surface. It’s more blocky than bumpy. There are more advanced algorithms you can use to generate a bumpy surface, but this runs fast enough in Javascript and doesn’t require an advanced shader model.

Note that the surface you generate from this noise function will have no border as the function itself is defined for all (x, y, z). If you want a border, you can create one with ease by amending the inside function:

this.inside = function(x, y, z) {
	if (x < LLIMIT.x || y < LLIMIT.y || z < LLIMIT.z ||
		x > ULIMIT.x || y > ULIMIT.y || z > ULIMIT.z)
		return false;
	return field.get(x, y, z) > 0.5;
}

That’s how I generate the solid walls that border the pavo game space.

Another trick I used in pavo involves the lighting. In Fissure I placed a single light at the camera position to light the way for the player, but for pavo I wanted lights all over the place. Dynamic lighting is computationally expensive, and probably an unecessary luxury for a small browser game, but static lighting is cheap and easy. My favorite. Can I use a noise field to generate this? You bet I can.

light = new FOAM.Noise3D(seed, 1.0, source.x, scale.x, source.y, scale.y, source.z, scale.z);

...

light.gets = function(x, y, z) {
	return Math.pow(light.get(x, y, z), 2);
};

...

mesh = new FOAM.Mesh();
mesh.add(program.position, 3);
mesh.add(program.texturec, 2);
mesh.add(program.a_light, 1);

...

mesh.set(x, y, z, t0, t1, light.gets(x, y, z));

I created a noise field to represent the light intensity at any point. To emulate how light intensity diminishes as the square of the distance, I extended the noise object with a new method. When I add a vertex to the mesh, I assign the calculated light intensity to it. The GPU will generate an interpolated light value that I can use in the fragment shader.

The same technique can be applied to objects moving through the space, so that they will appear to be slipping through areas of light and shadow. And there you have it. I’m targeting pavo for an end of year release, though it may slip, given the holidays.

more things in new places

I’ve spent my Sunday afternoon porting the original Habari blog here to Tumblr. There weren’t many posts, so no biggie. The only thing that took a little thought was the redirect from the old site. This is pretty much how I wanted it all along: a project space that I would manage manually, and a blog space managed by someone else.

EDIT: in light of subsequent events, HA HA HA HA HA HA *choke*

pavo: a first look

One thing I buy RPGs for—aside from the thrill of leveling up, and reading through endless accounts of how the People of the Thrane took Belmoor Keep from the Elves in the Battle of Bethelisgor in the Year of the Spotted Nyrd—is exploration. I love wandering through a world, picking out little details, odd characters, secret places. (Which makes it all the more frustrating that Bethesda still hasn’t fixed that halt-every-five-seconds bug in Skyrim, but that’s another, longer, angrier post.)

I’m also fascinated by procedural generation, which kind of puts me at odds with myself regarding RPGs. In its modern form, the RPG is the apex of “designed” content—from artwork to scripting to voice acting to mapping. There is little left to chance.

So: I’m conflicted. I’d like to write a game that includes RPG elements I like, but is also procedurally generated, and that’s what pavo is going to try to be.

My god, it’s full of pastels. In fact, the name pavo originated as a contraction of “pastel voxels”. Borderlands and its cell-shaded look inspired the sharp black outlines of the world, but I’m afraid I’m solely responsible for the pastels. The world itself is made of a three-dimensional noise field, and at some point I’ll write a post about that.

The world is explorable in all three dimensions. You can jump up onto surfaces to explore higher levels, and jump back down again.

Some areas can be a little spooky, especially when you run into ghosts.

And they’re not just any ghosts. They’re robot ghosts. But don’t be afraid. They’re friendly, and even a little talkative.

That’s all the screenshots I’ve got for now. There’s a story about why this place is, somewhere in the back of my head, but I’ll leave it there. Maybe you can ask the ghosts.

please do not leave blogs unattended

Much as I hate blogging for the sake of blogging, I figured it was time for an update. I’ve been working on my new game/toy/interactive fiction thing, Pavo, and I will be putting up some screenshots soon. I’m also seriously considering a new theme for this blog. The rounded-corner islands look seemed fresh a couple of years ago. Now, not so much.

I’m also deep into Skyrim, which doesn’t aid productivity, much in the same way that having a hole drilled into your head doesn’t aid concentration. It’s a vast and lovely world, though because of the engine change it still kind of feels like Fallout 3 wearing a Tolkien skin. No show-stopping bugs so far but I wish

the terrain streaming

had been thought out

a little better

and

didn’t interrupt the action every 5

seconds.

infinite textures made easy

If you’ve played Fissure or read previous articles on it, you know that the Fissure map is effectively infinite (and therefore dull). I needed a way to texture an infinite map in a way that didn’t require a huge image download, but didn’t look like the same texture repeated over and over again. It had to vary across the surface—not just the pattern, but the color, suggesting different compositions of rock across the interior of the cave.

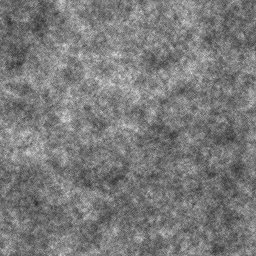
My solution: Perlin noise in the shader. I used Gimp to create a difference cloud.

A difference cloud bitmap works better than pure white noise, where each pixel is a random number and bears no relationship to its neighbors. The source image should have some structure to it, some pattern. I’ve generated useful images with a Drunkard’s Walk, increasing each pixel value as I stumble over it, though this takes many cycles to get anything useful.

Once I had the source image, I put it into Fissure as a texture and passed it to my fragment shader for the cave.

(irrelevant bits snipped)

uniform sampler2D tex0;
varying vec2 uv;

void main(void) {
	vec3 t0 = texture2D(tex0, uv * 1.0).x * vec3(0.8, 0.4, 0.2);
	vec3 t1 = texture2D(tex0, uv * 5.0).x * vec3(0.3, 0.6, 0.8);
	vec3 t2 = texture2D(tex0, uv * 25.0).x * vec3(0.6, 0.8, 0.5);
	vec3 t  = t0 + t1 + t2;
	gl_FragColor = vec4(t, 1.0); 
}

The uv variable holds the texture coordinates for this fragment and tex0 holds the difference cloud texture above. I use three samples of the texture to build the final pixel value, multiplying the texture coordinates by a progressively larger number. The texture is greyscale, so I only need one of its RBG components. I multiply the greyscale texture by a color of my own choosing.

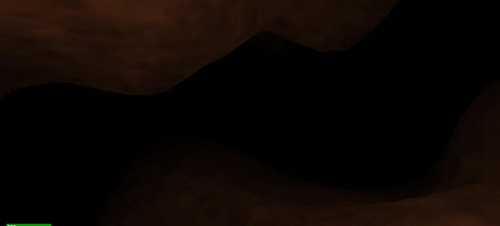
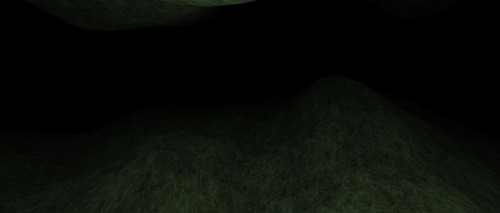
Here are what the t0, t1, and t2 contributions look like on their own.


The t0 contribution spreads the original texture over a large area, whereas t1 and t2 are 5 and 25 times smaller, respectively. I chose dark colors so that the sum of all the contributions would vary as much as possible.

As I travel through the cave, I note gradual changes in color. There is no obvious boundary between one sort of “rock” and another. I’m not sure how accurate this is, as a cave on Earth would show bands of color denoting the different strata. I’d assume that a moon in deep space would have followed a different geological path.

Performance cost is minimal, and only a small source texture is required. Mine is 256×256, which is 53K in PNG format. (JPEG compresses smaller, but I found the lossy artifacts distracting when they were blown up across the surface.)

Like any procedural technique, it’s no substitute for a pro artist or modeler. As I’m neither of those things, I found it a useful way of producing something interesting to look at so I could get back to thinking about gameplay and writing.

please release me

Aside from the troubles I’ve been having with shader attributes, I’ve also had a lot of issues with generating releases from my WebGL projects. Typically, they consist of a handful of Javascript files, HTML and CSS documents for the UI, a subdirectory for any binary resources like images, a GLSL file containing the shader code, and an index.php to tie them all together. I like having a separate files to edit instead of trying to deal with one big document with all the markup and code, so I sprinkle the index.php with include directives pointing to the other files.

However, the release version—the one I put out here on the web—should consist of as few files as possible. That way, we minimize the number of round trips the browser has to make to the server, and reduce the total load on the sever. It’s possible to do this by hand, and that’s been my solution for some months now: paste the actual files over the PHP includes, concatenate and minimize the Javascript, and so on.

A few days ago, I wrote a tool to automate releases. It’s JS/PHP based, and I had hoped it would become a turnkey solution. Instead, it’s a bit of a turkey.

Given the URL of the project, the release tool loads it into an iframe. Since this is going through the server, all the PHP includes are replaced with the actual files. That’s a good start. I extract the project DOM, concatenate all the scripts and send the result to a closure compiler to minimize it. Again, great stuff, and maybe if I’d stopped there, I might not be tearing out what’s left of my hair.

But no, I had to be lazy. Why can’t it edit the index.php for me? Why can’t it swap all the script tags out and replace them with a single reference to the minimized script?

Well, it can, and it does. The problem is, that’s not all it does. As a consequence of the document existing in the DOM, we lose stuff. The , for example, sits outside the DOM and isn’t represented within it, so that gets lost when we write the file back out. Markup inside the tag is transformed into a hash of special HTML characters. I’ve noticed a few other weird substitutions that I can’t account for.

It’s especially frustrating because it’s ninety-nine percent there but that remaining one percent is so worrisome. I spent most of the afternoon trying to track down mistakes I thought I’d been making when the fact was, they’d been manufactured by my very own release tool.

I haven’t given up, even if I have to scale back its responsibilities. I will be looking into a regex-based substitute, forgoing the DOM completely. If I come up with a release tool that covers that remaining one percent, I’ll go ahead and release it.